
How to measure your art for the perfect frame
Framing at home?
Use this step‑by‑step guide, built with archival best practices to get accurate measurements for your print, mat, and frame. When in doubt, a local professional framer is always a great option, and you can also order a ready‑to‑hang frame directly from any print’s product page.
Step 1:
Step 3:

Step 2:
Step 4:
How to measure your art for the perfect frame
Framing at home? Use this step‑by‑step guide—built with archival best practices—to get accurate measurements for your print, mat, and frame. When in doubt, a local professional framer is always a great option, and you can also order a ready‑to‑hang frame directly from any print’s product page.
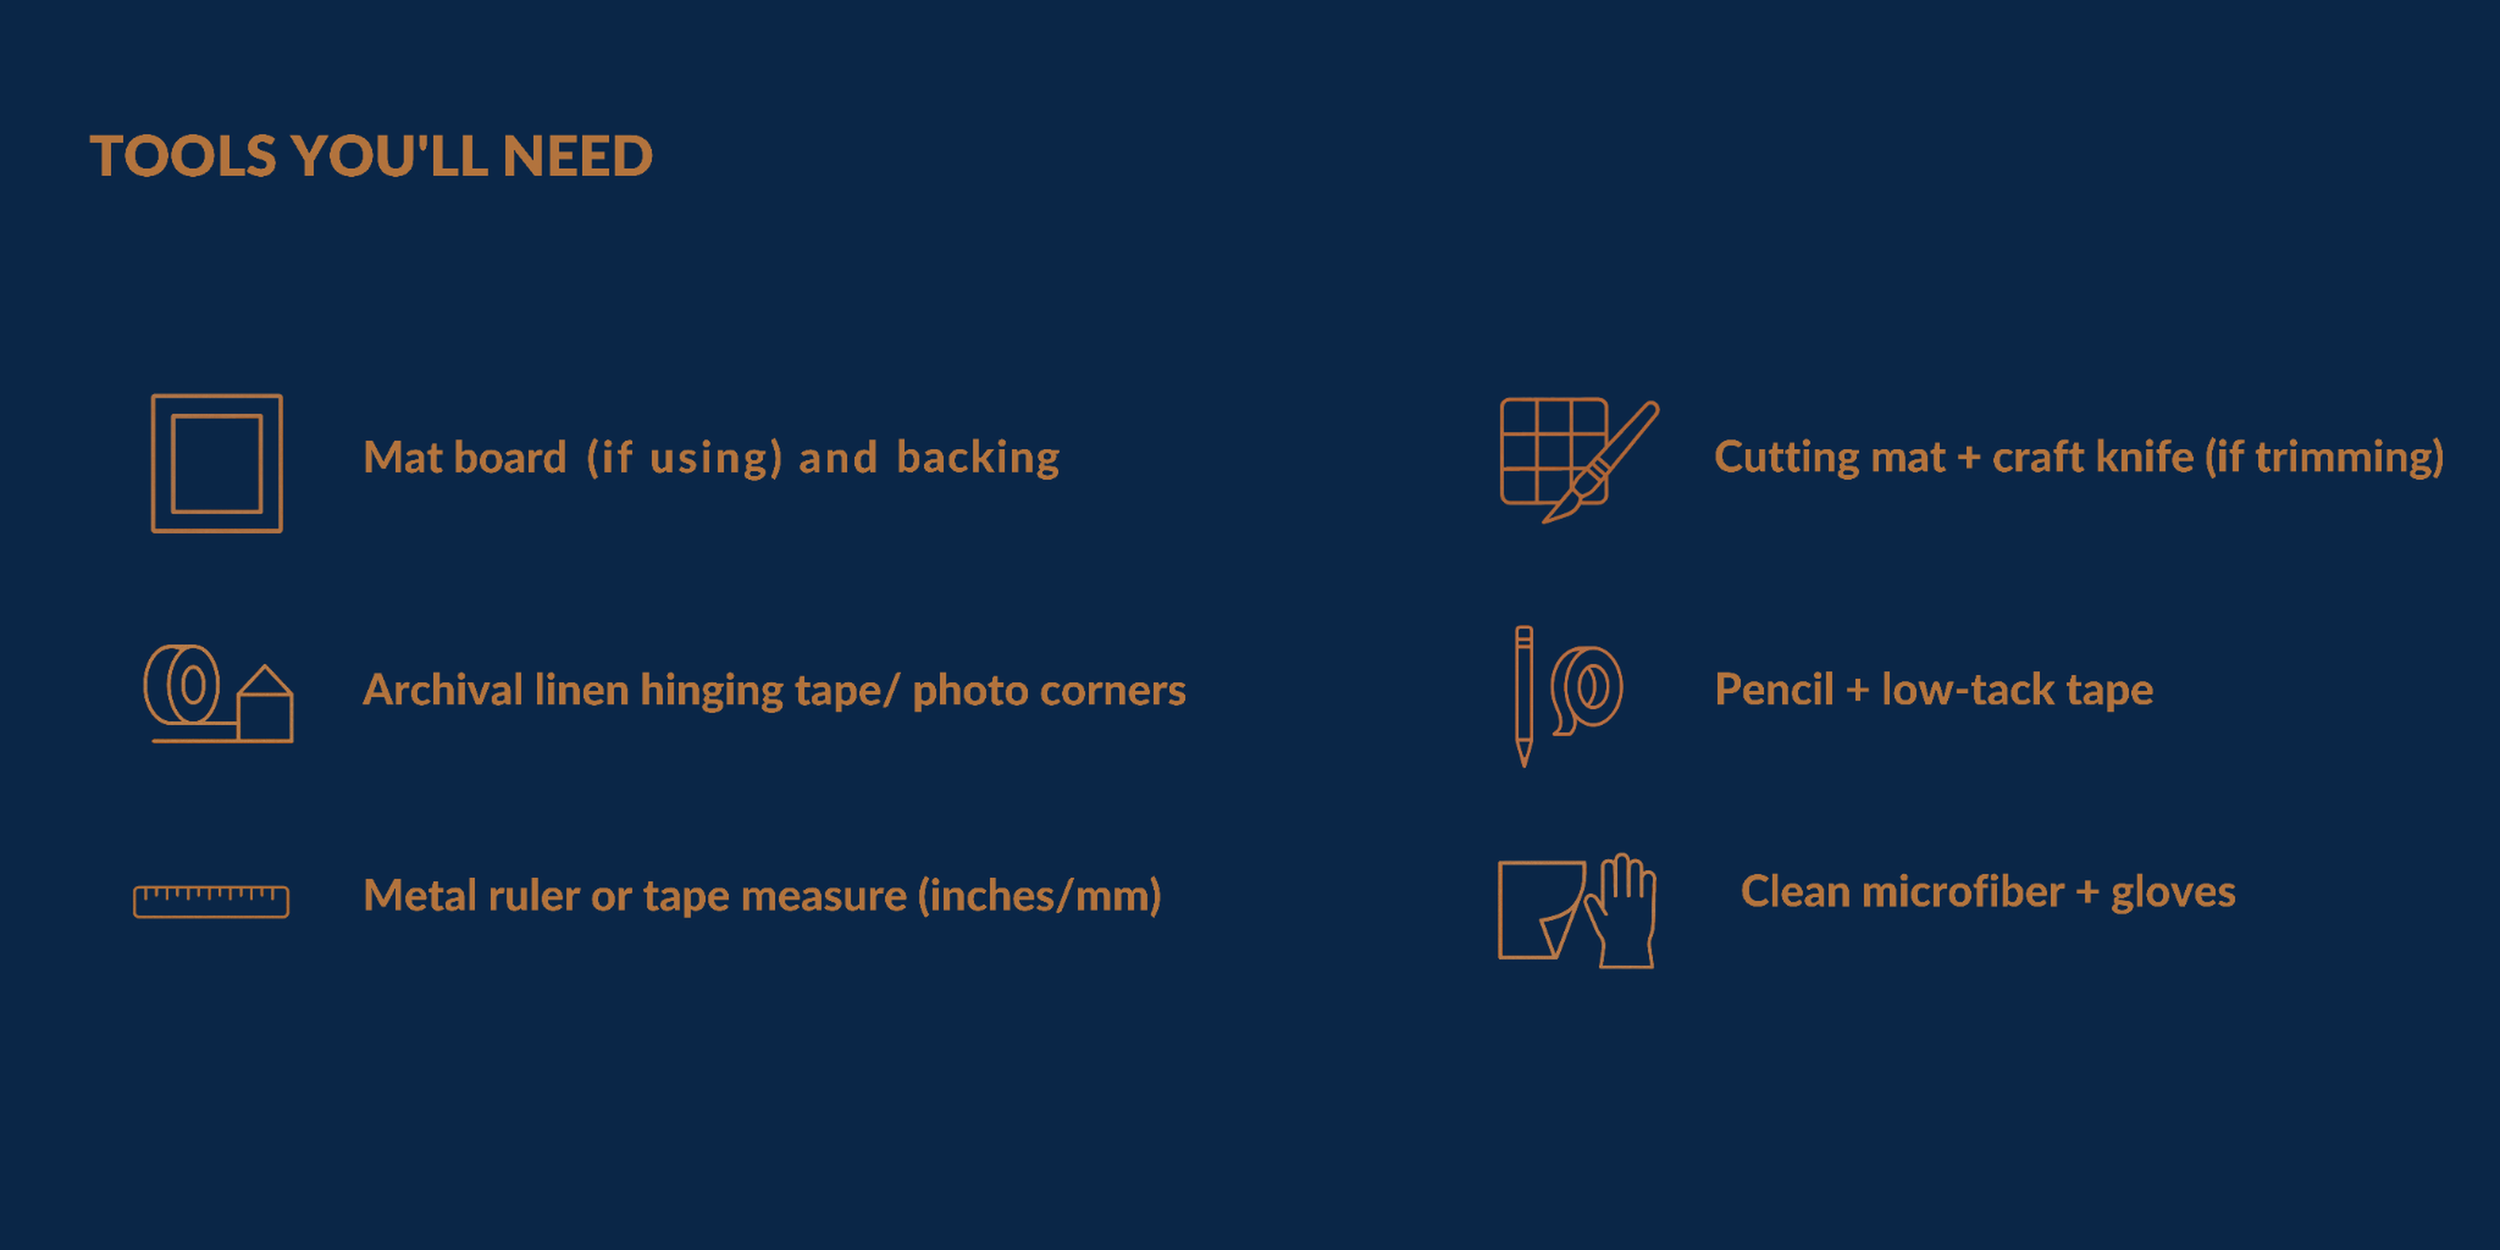
Tools you’ll need
- Metal ruler or tape measure (inches/mm)
- Cutting mat + craft knife (if trimming)
- Pencil + low‑tack tape
- Mat board (if using) and backing
- Archival linen hinging tape / photo corners
- Clean microfiber + gloves (avoid fingerprints)
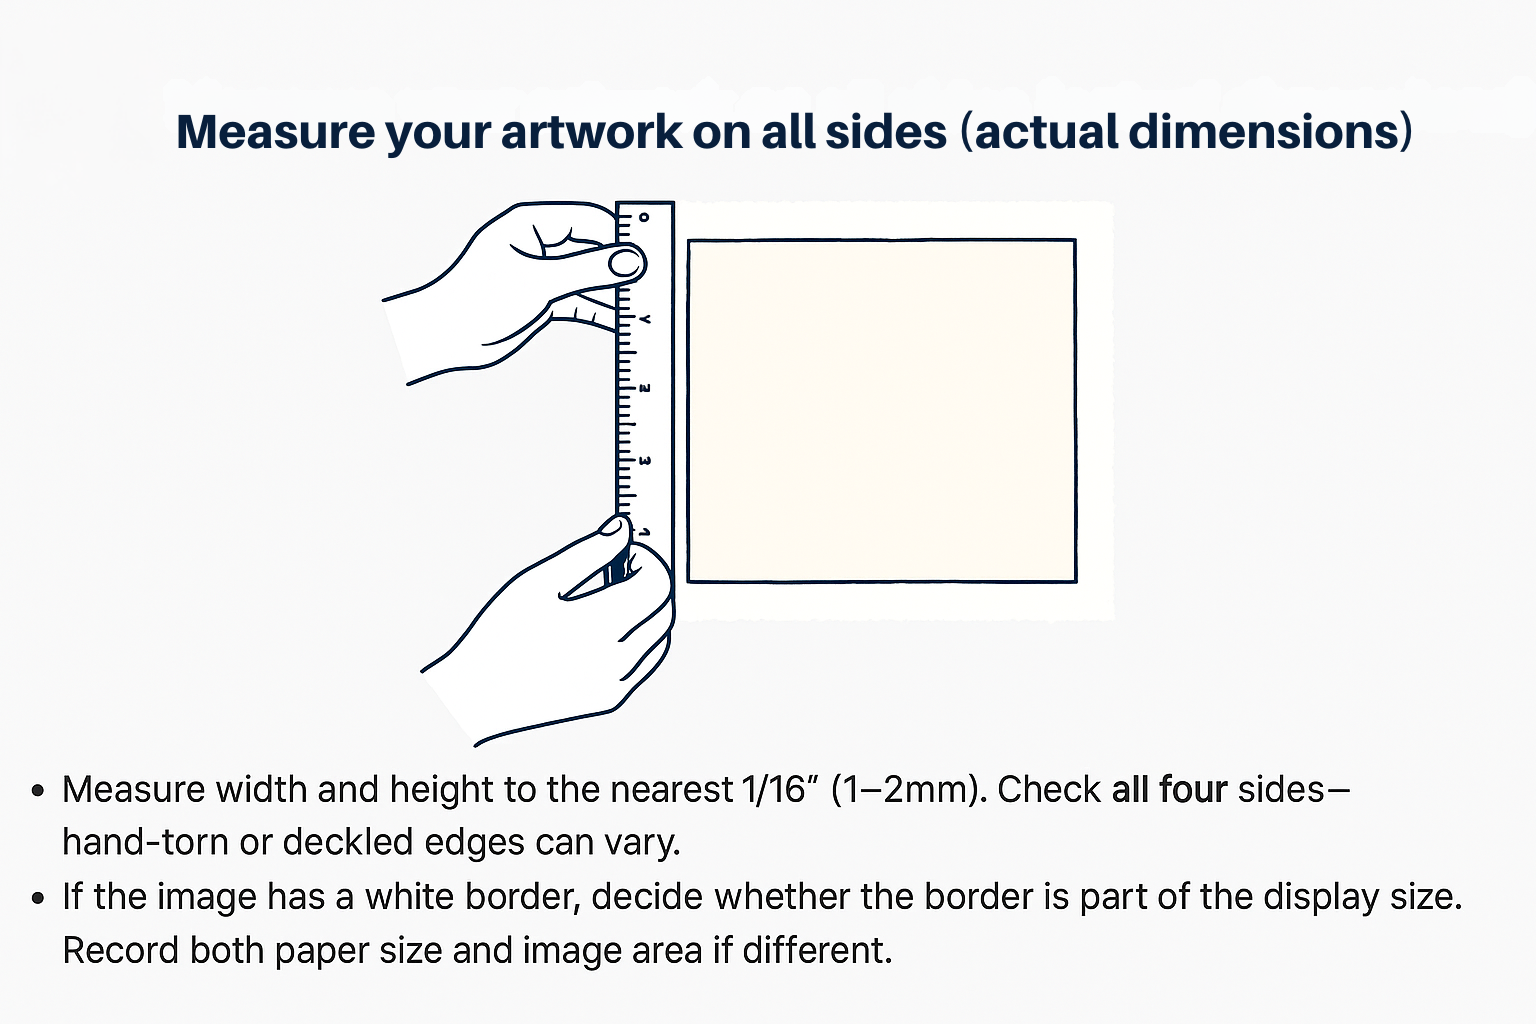
Measure your artwork on all sides (actual dimensions)
- Measure width and height to the nearest 1/16” (1–2mm). Check all four sides—hand‑torn or deckled edges can vary.
- If the image has a white border, decide whether the border is part of the display size. Record both paper size and image area if different.
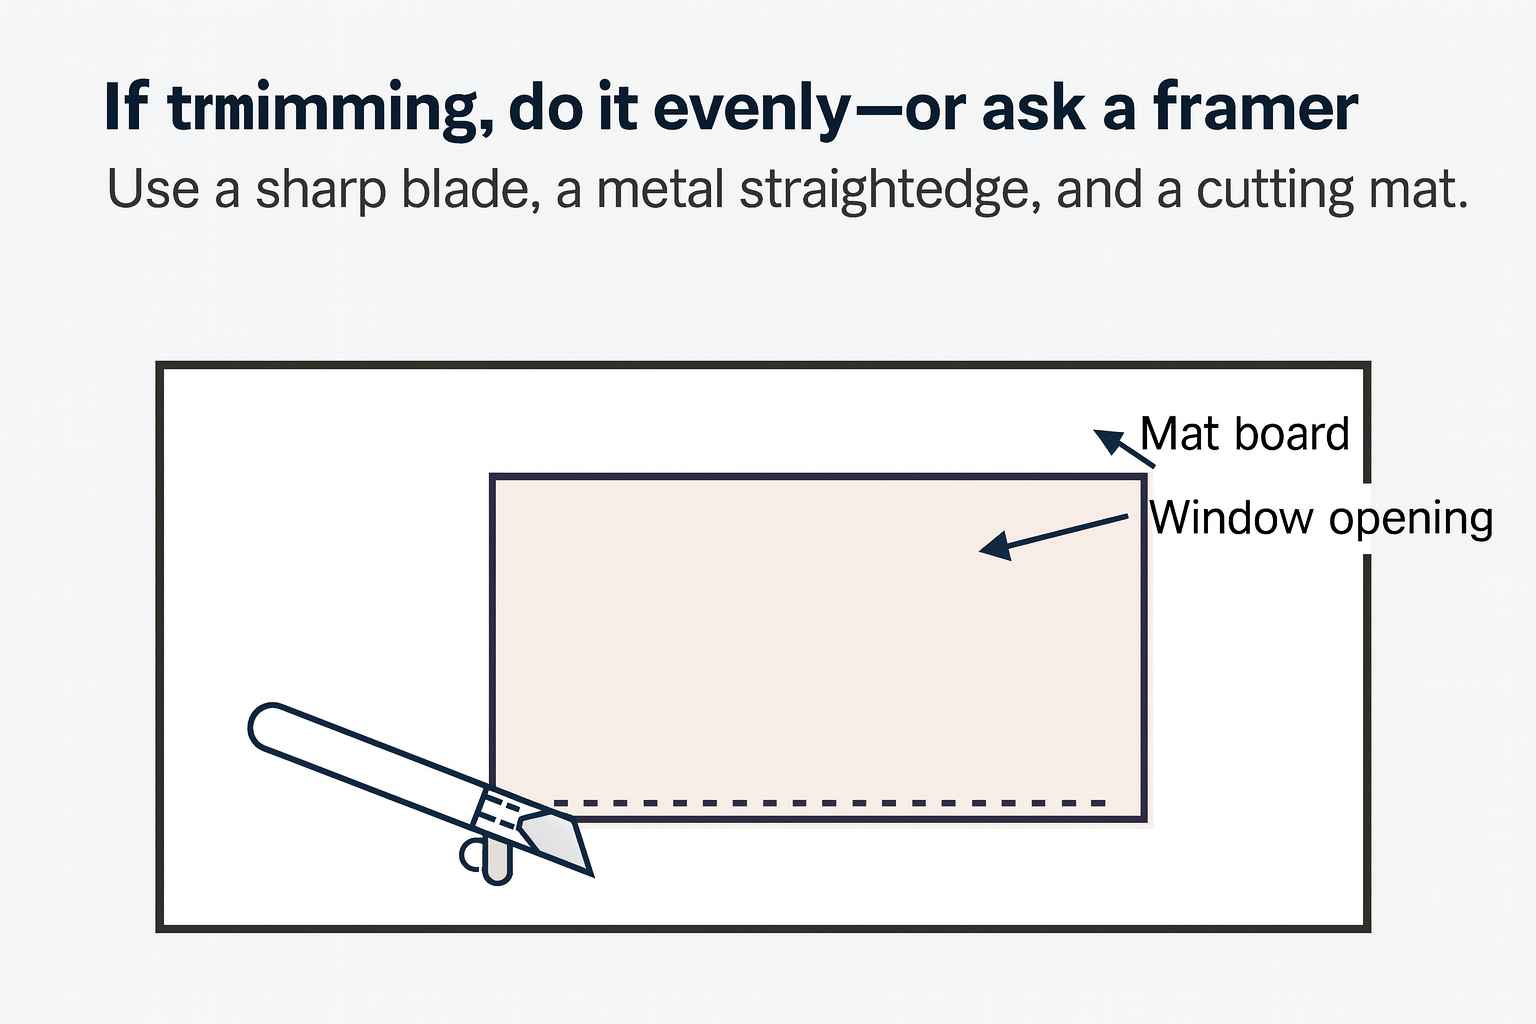
If trimming, do it evenly—or ask a framer
- Use a sharp blade, a metal straightedge, and a cutting mat. Make multiple light passes rather than one heavy cut.
- If you’re unsure, take it to a local framer. Uneven trimming can cause visible gaps once framed.
Measure the interior of the frame (the rabbet)
Measure the inside lip where the glazing, mat, and artwork sit—not the outer frame size. This ensures everything fits.
Matting? Plan the window opening and overlap
- Mat windows are typically cut 1/4” (6–7mm) smaller than the image area so the mat slightly overlaps the print.
- For balanced borders, choose a mat width (e.g., 2–3”) that suits the frame size and artwork scale.
Float mount or centered look? Use archival hinges
- For a "floated" presentation with a reveal around the edges, hinge from the top using archival linen hinging tape or use photo corners.
- Leave an even reveal (commonly 1–2” all around). Add spacers if not using a mat to keep the print off the glazing.
When in doubt, contact a local framer—or order framed from the product page
Pros can help with precision cuts, conservation materials, and the perfect fit. You can also choose a ready‑to‑hang frame option on any print page here on the site.
Pro tips for a museum‑quality result
- Use acid‑free mats and backing; choose UV‑filtering glazing for sunlit spaces.
- If the frame seems tight, never force it—tiny variations add up. Re‑measure the rabbet and components.
- Wipe dust away as you assemble. A rocket blower helps keep particles off the print and glazing.
- Let paper acclimate to room humidity for an hour to reduce minor curl before mounting.
- For deckled edges, a float mount with a shadow gap highlights the texture beautifully.
Common mistakes to avoid
- Measuring the outer frame instead of the interior rabbet.
- Forgetting mat overlap—window cut equal to the image area may show unwanted slivers.
- Using non‑archival tapes that yellow or fail over time.
- Skipping spacers when framing without a mat, causing the print to contact the glazing.
- Trimming without a guide, leading to off‑square edges and uneven borders.